Well hello, it feels like it’s been longer than a couple weeks since I last shared my progress on our master bedroom. Week 5 was skipped to give space for a much bigger topic. One that I think we all felt called to highlight and continue to do so. #blacklivesmatter always and especially now.
I am happy to report I’ve been chipping away at projects and the progress is showing. Just 2 weeks left til reveal, so it’s crunch time!
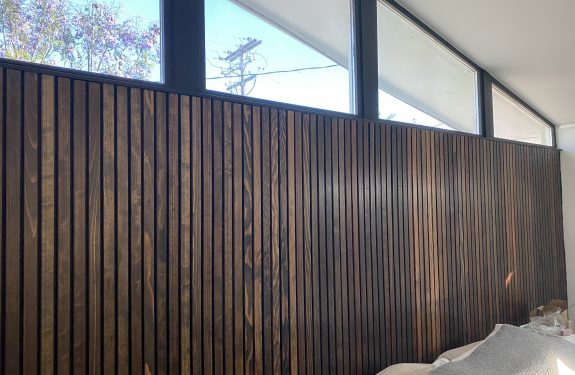
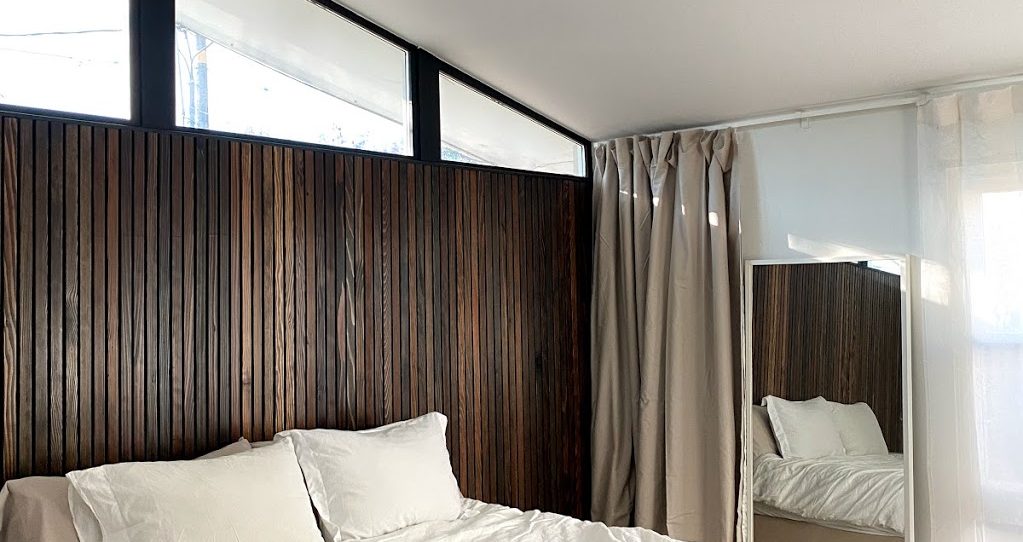
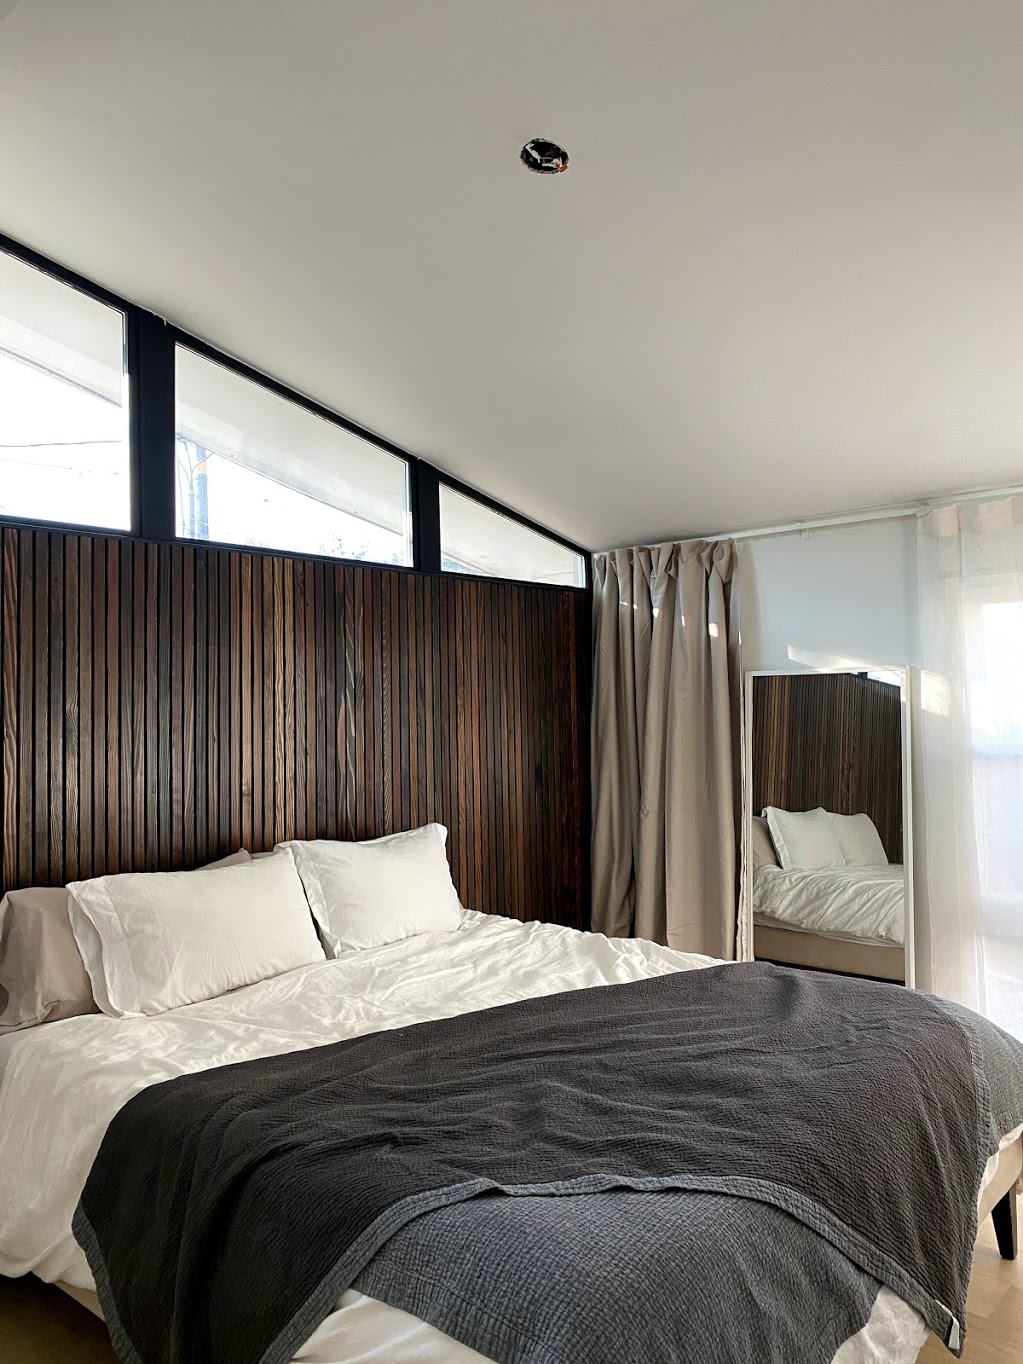
I wrapped up the never-ending slat wall. Boards are still drying for the window portion and need to be installed but since I broke those sections up let’s call one portion done! I’m super happy with it. There were definitely moments of uncertainty during staining as the variation in woods on each board was much more than I wanted. Half of the stack is even 1/4 inch larger and square while the first batch of wood was smaller with rounded edges. By the point I realized this inconsistency the boards were already home, cut, sanded, and there was no way I was going to shell out the cash or time to hunt down more supplies but luckily once I grouped each type together during install along the wall you don’t even notice the size difference. I plan to break down the steps I did to complete the wall so stay tuned in a later post.
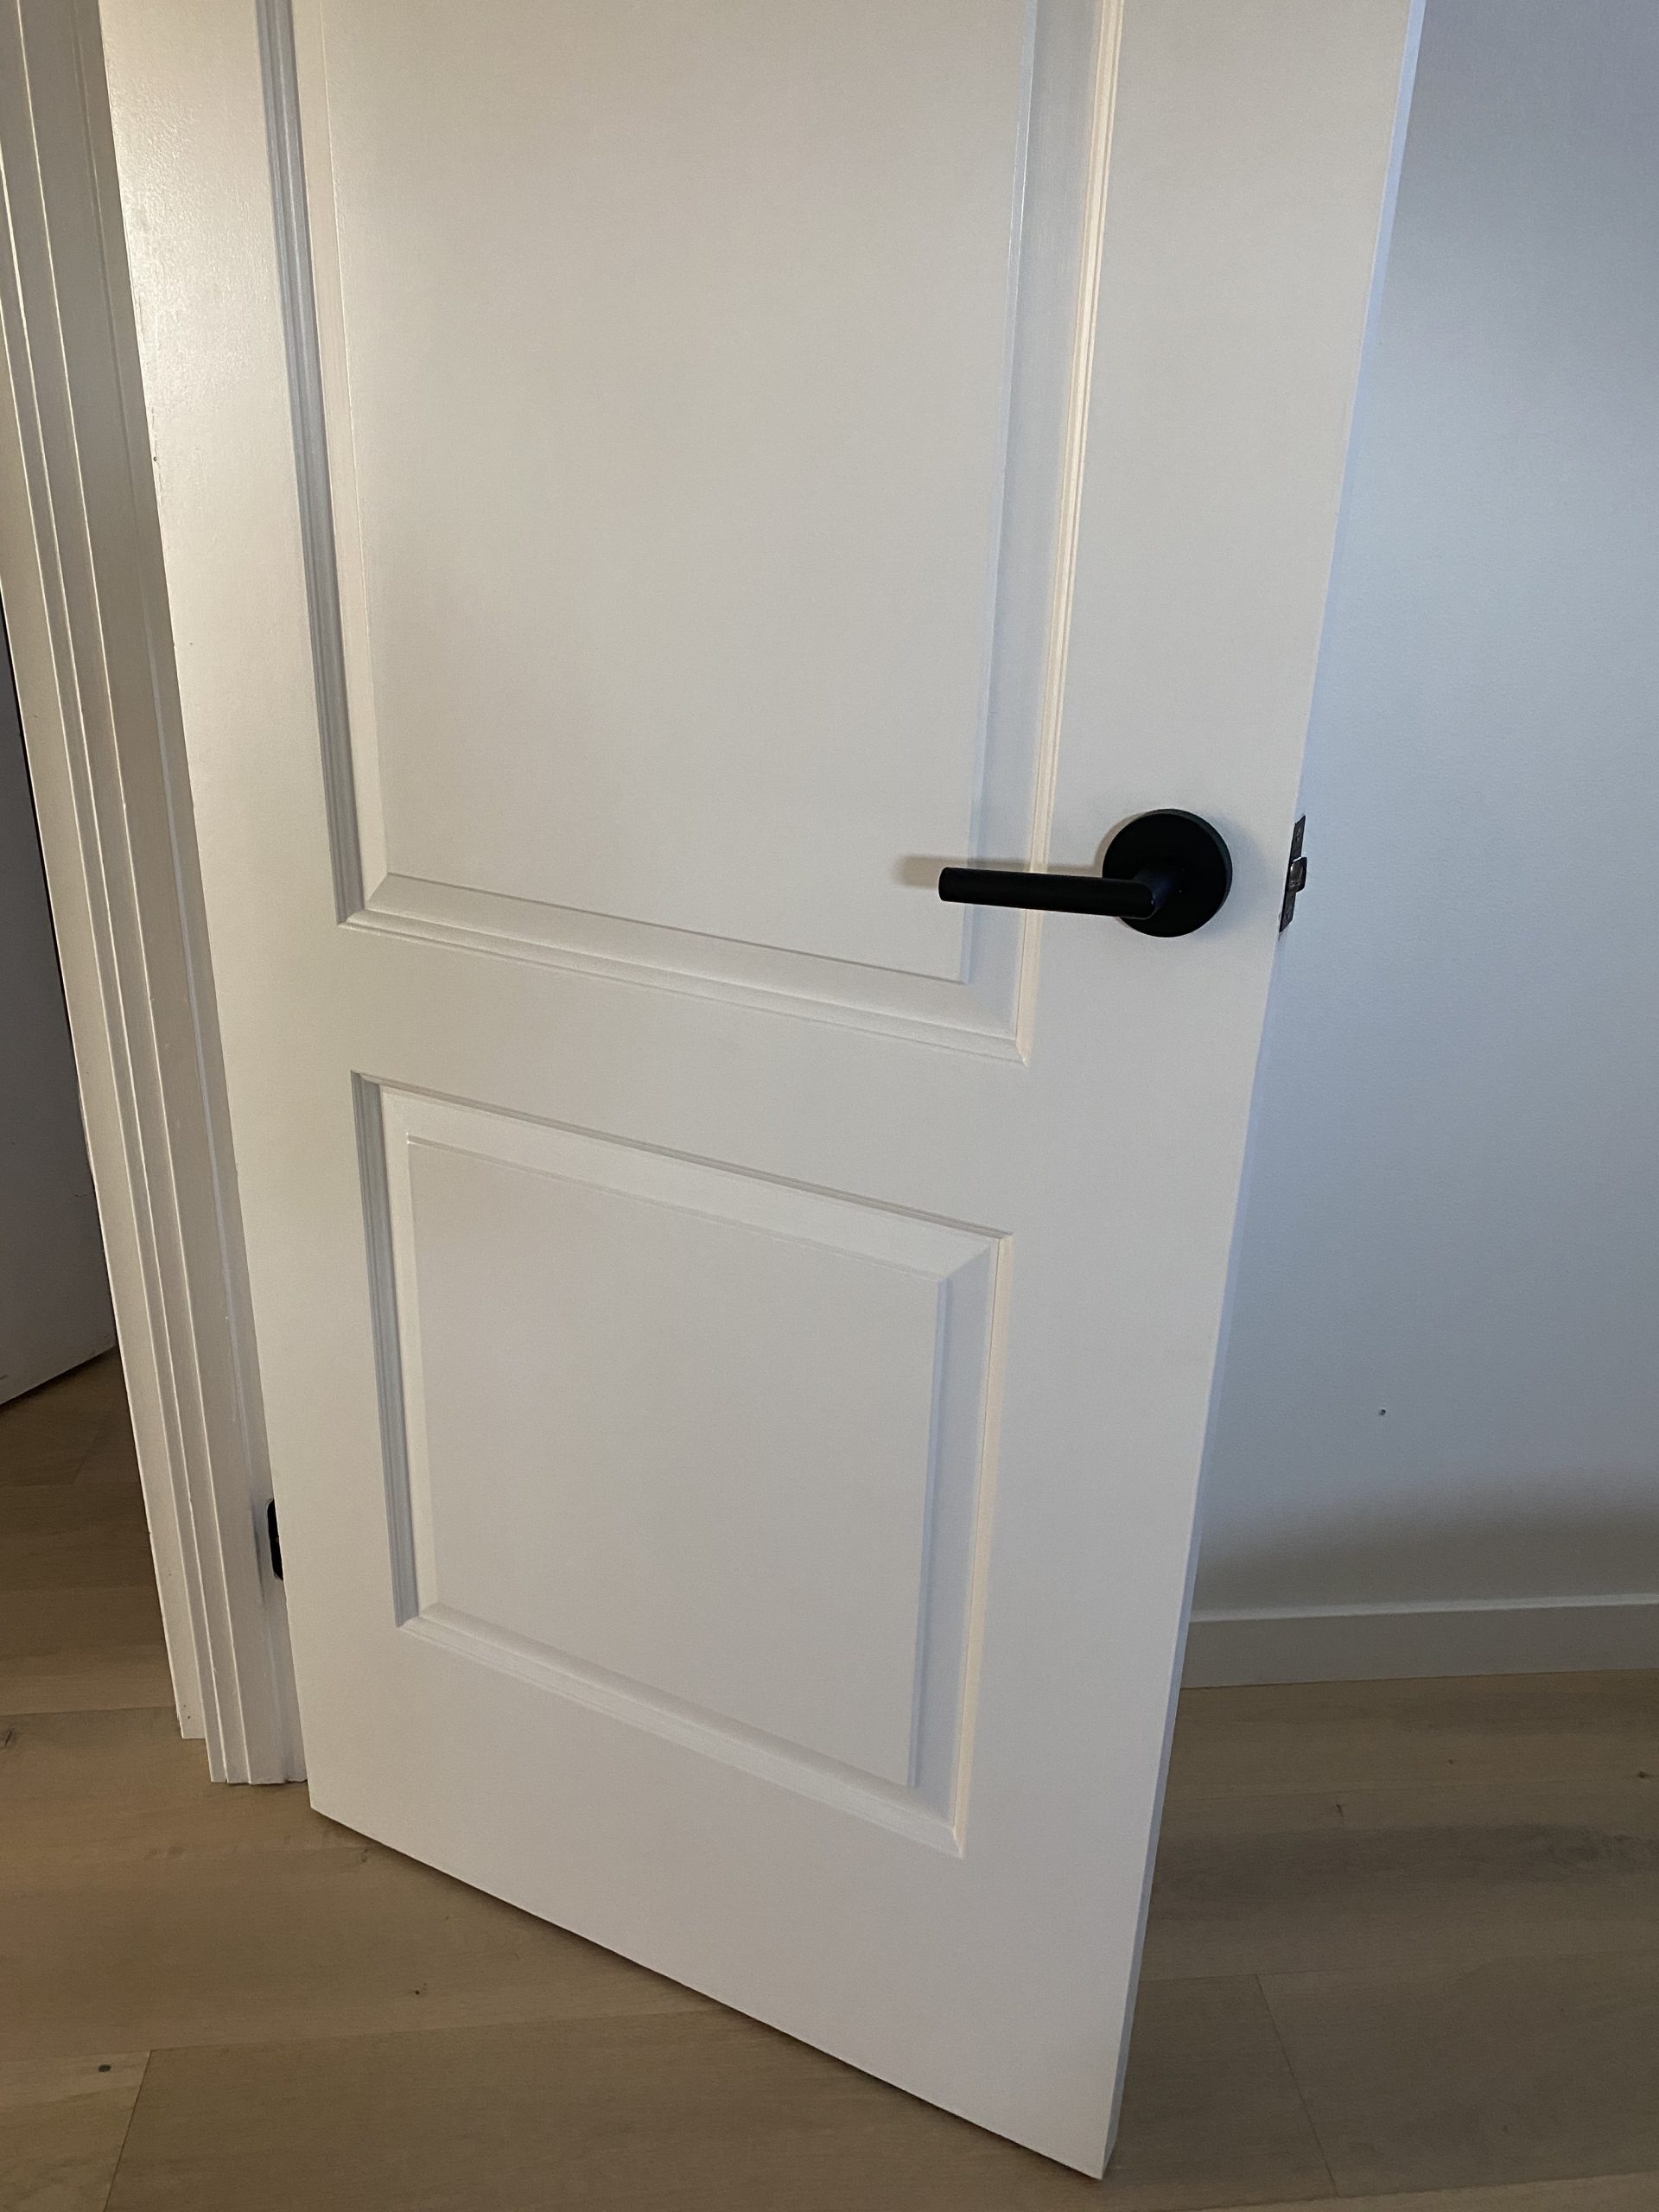
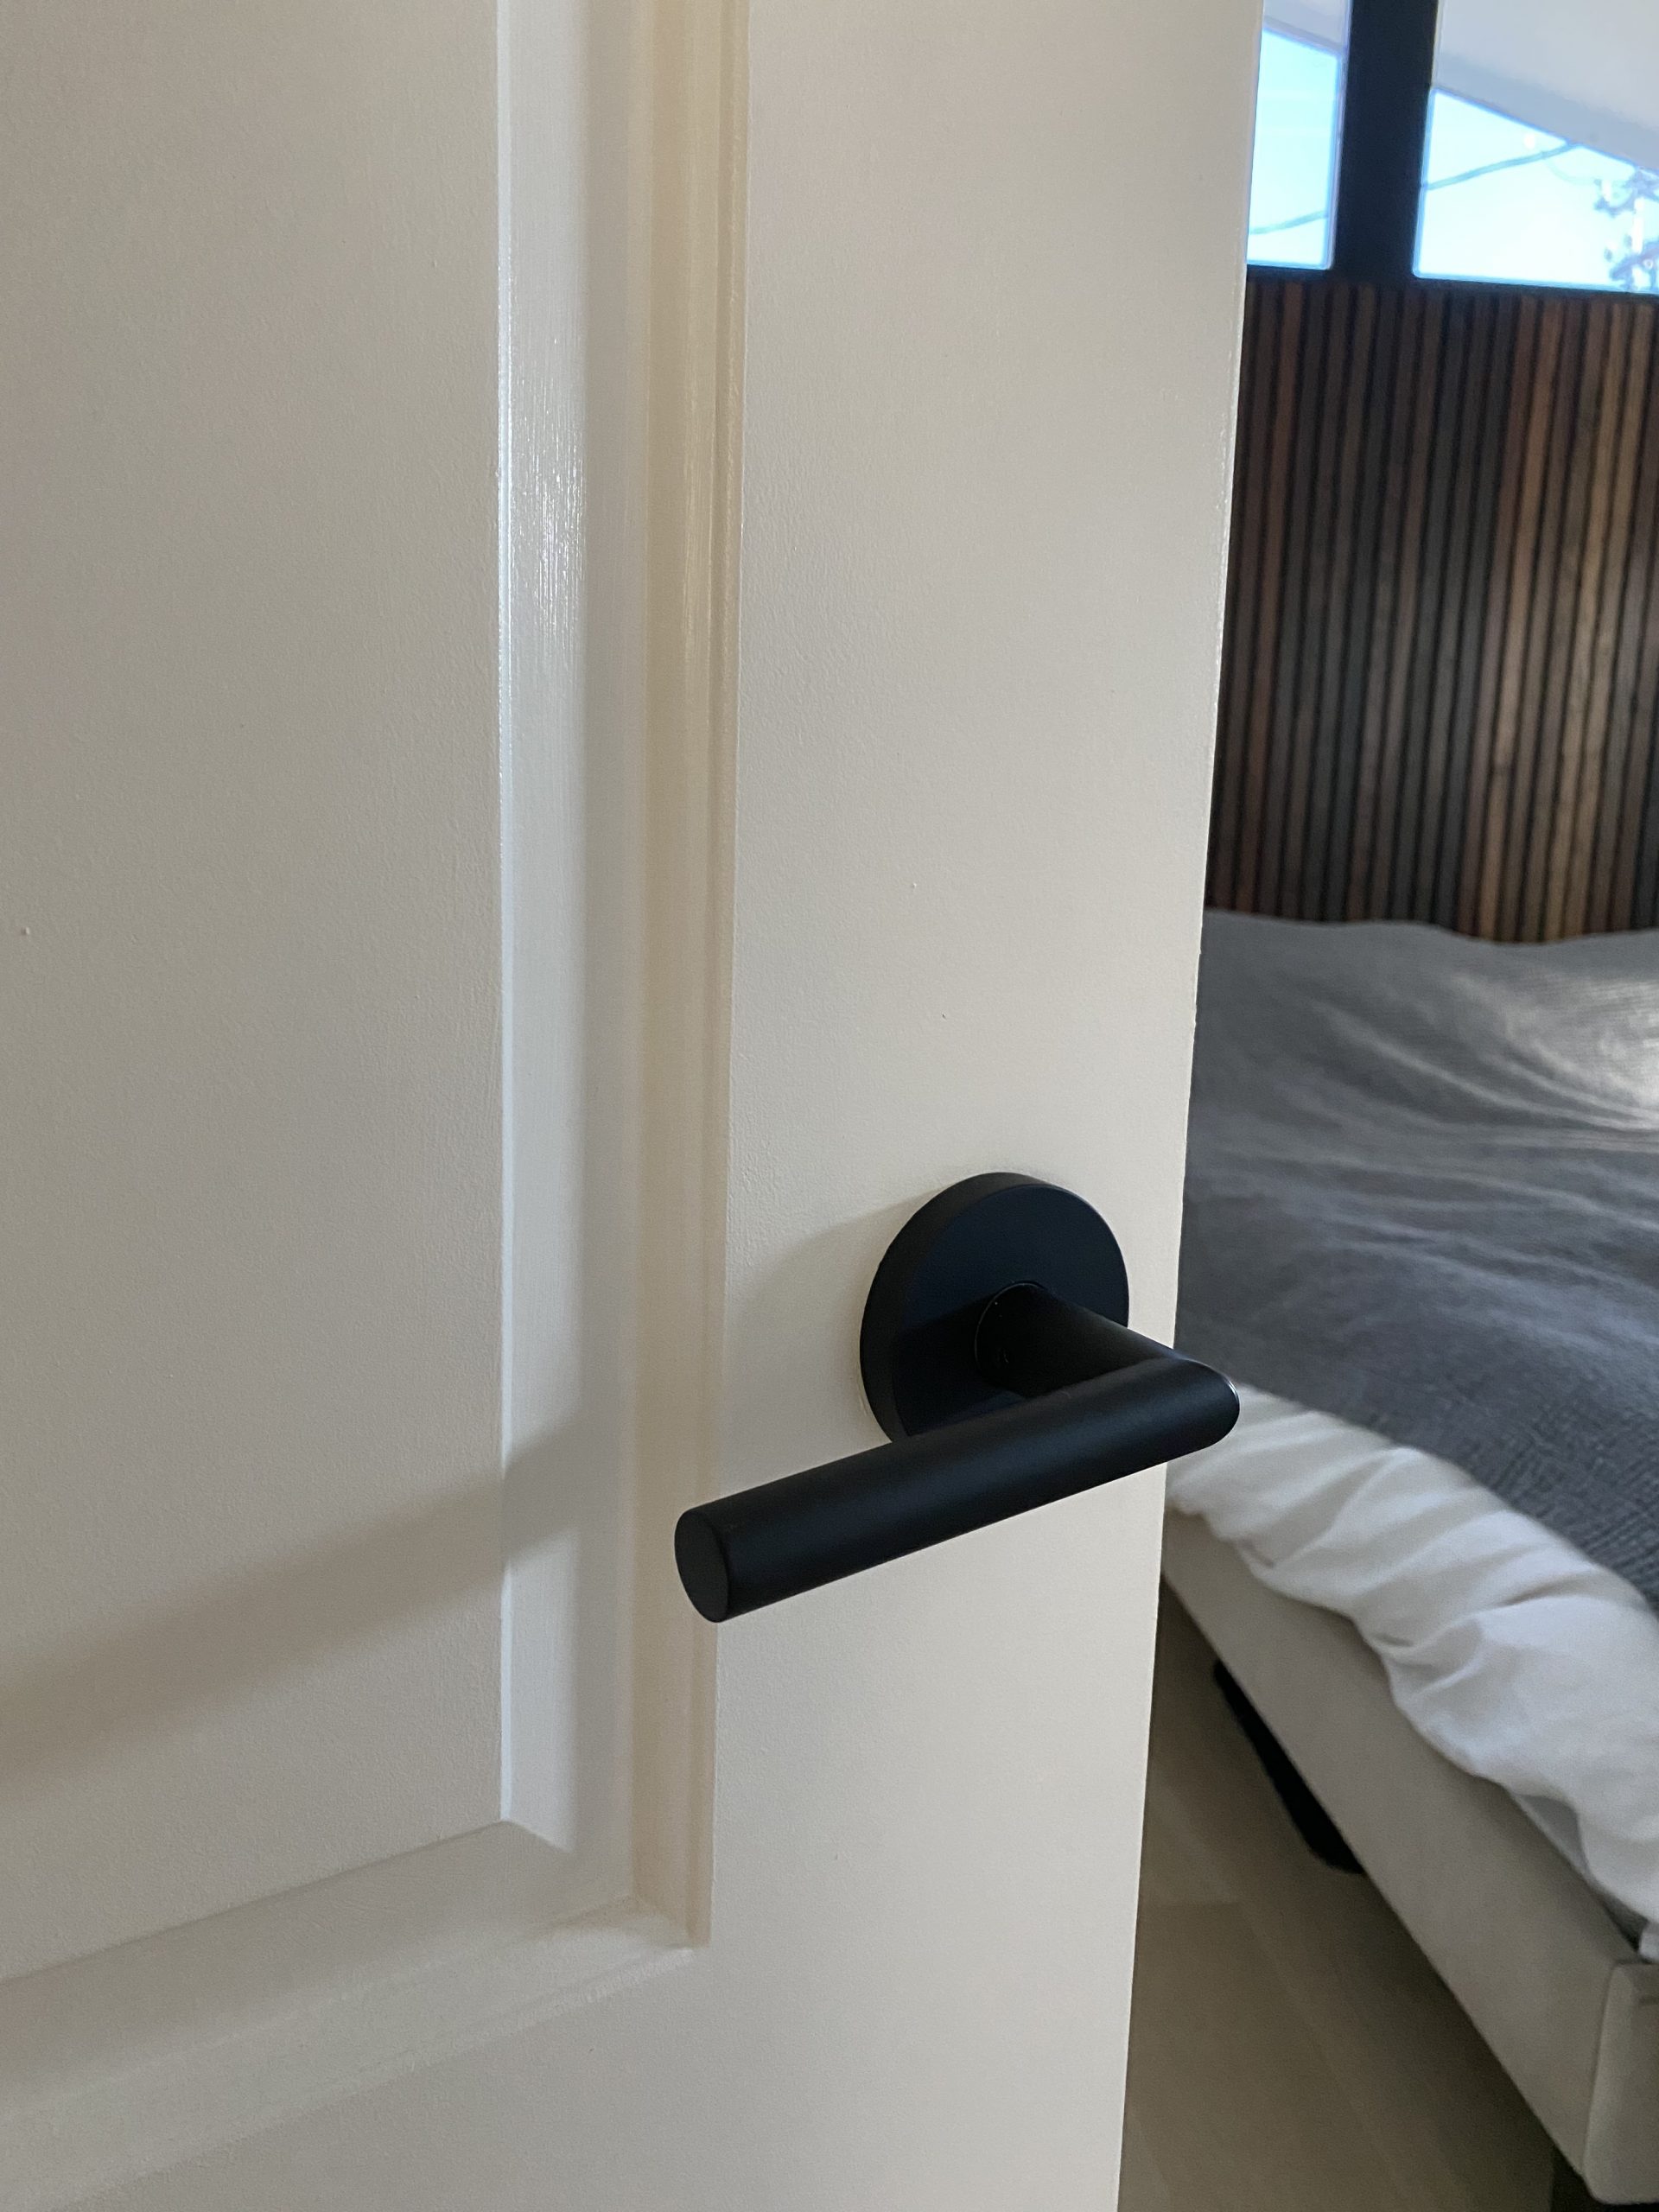
The bedroom door got a fresh coat of paint as it was in rough shape. I sprayed the hinges flat black and changed out the handle hardware to coordinate with the rest of the house. The bedroom doors have been the last to get that refresh.
The bedroom walls had recently been painted in Dunn Edwards Whisper in their velvet sheen, so just a bit of touch up was needed to cover nail holes and marks. I was hoping to avoid having to paint the ceiling but the patches where we had insulation blown in were VERY noticeable. They had done a light spray of paint but it just never covered well. As I attempted to give it another coat I realized this was a much more involved job and that spot sanding, priming, and painting the whole ceiling would need to be done to make it look right.
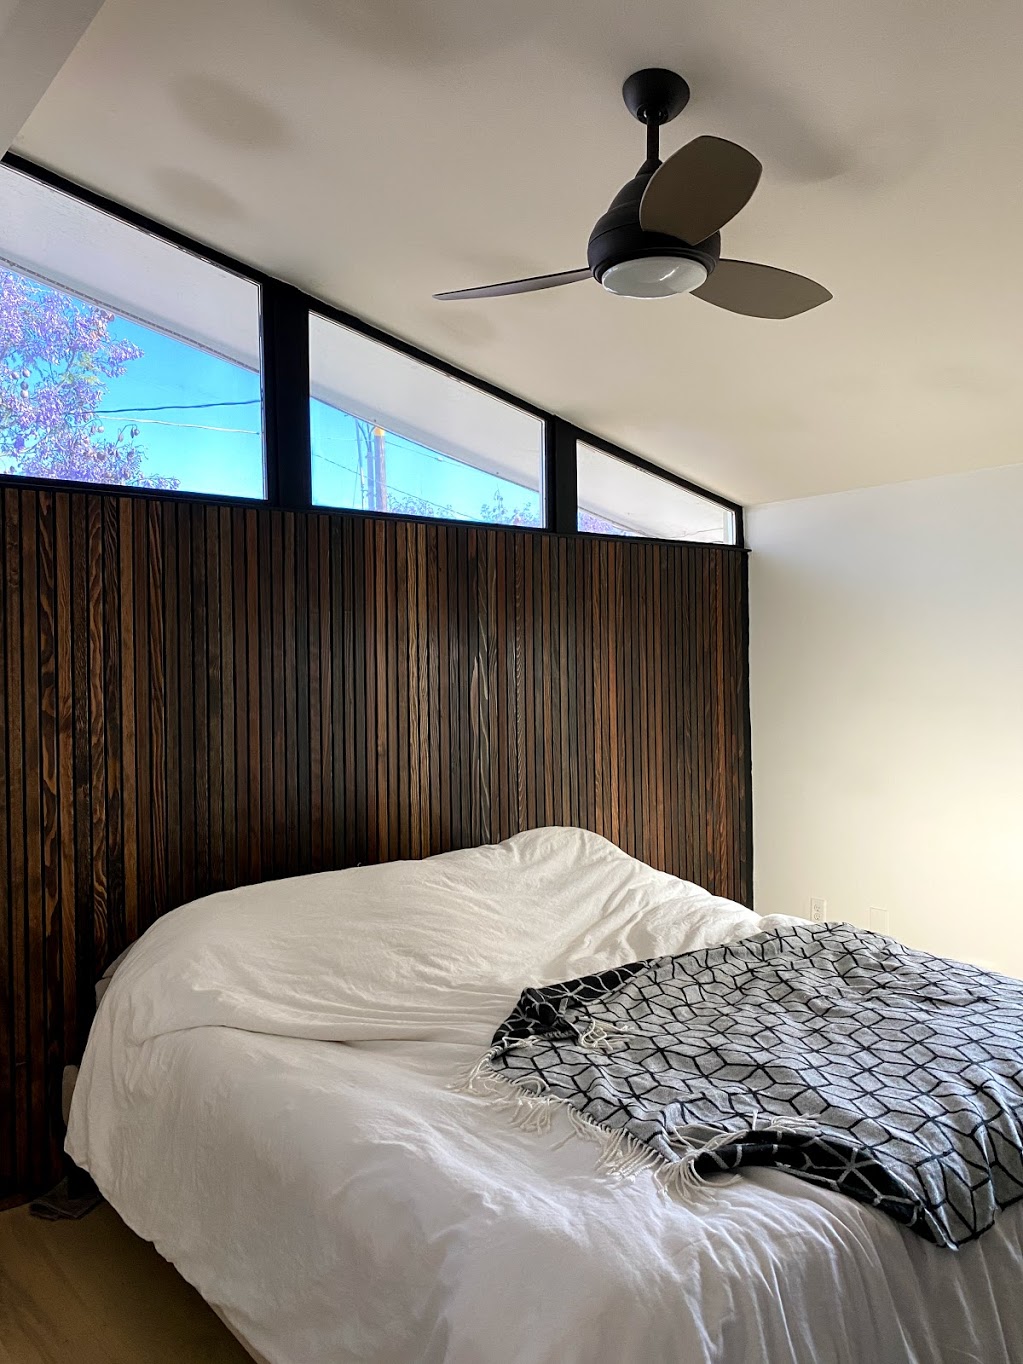

I have learned in renovation when it is time to call in help and this was one of those times. As I was covered in drywall dust with only an hour or so left before I was back on mom duty I made a phone call and our awesome painter/handyman said he could be there the next day. What would have taken me a full day or more between nursing and juggling the boys took him half a day at most. Just the prep work alone was worth it. What a world of difference a freshly painted ceiling does for the room! I mean can we get excited about a white ceiling for a second!?

Probably the biggest thing I tackled this past week was organizing and paring down our clothes, shoes, and whatever else was in our master closet so we could condense to one dresser and half hanging storage as I tucked the highboy dresser into the closet. Now I know that probably sounds crazy. Why not just keep the dresser out for added storage? As long as we have been in this home the dressers in the room have always felt in the way. They can really only fit on the headboard wall or side walls. The side walls mean the drawers open into the bed. My goal is for the room to have an open, clean, and minimal feel and I knew eliminating the dressers would do that.
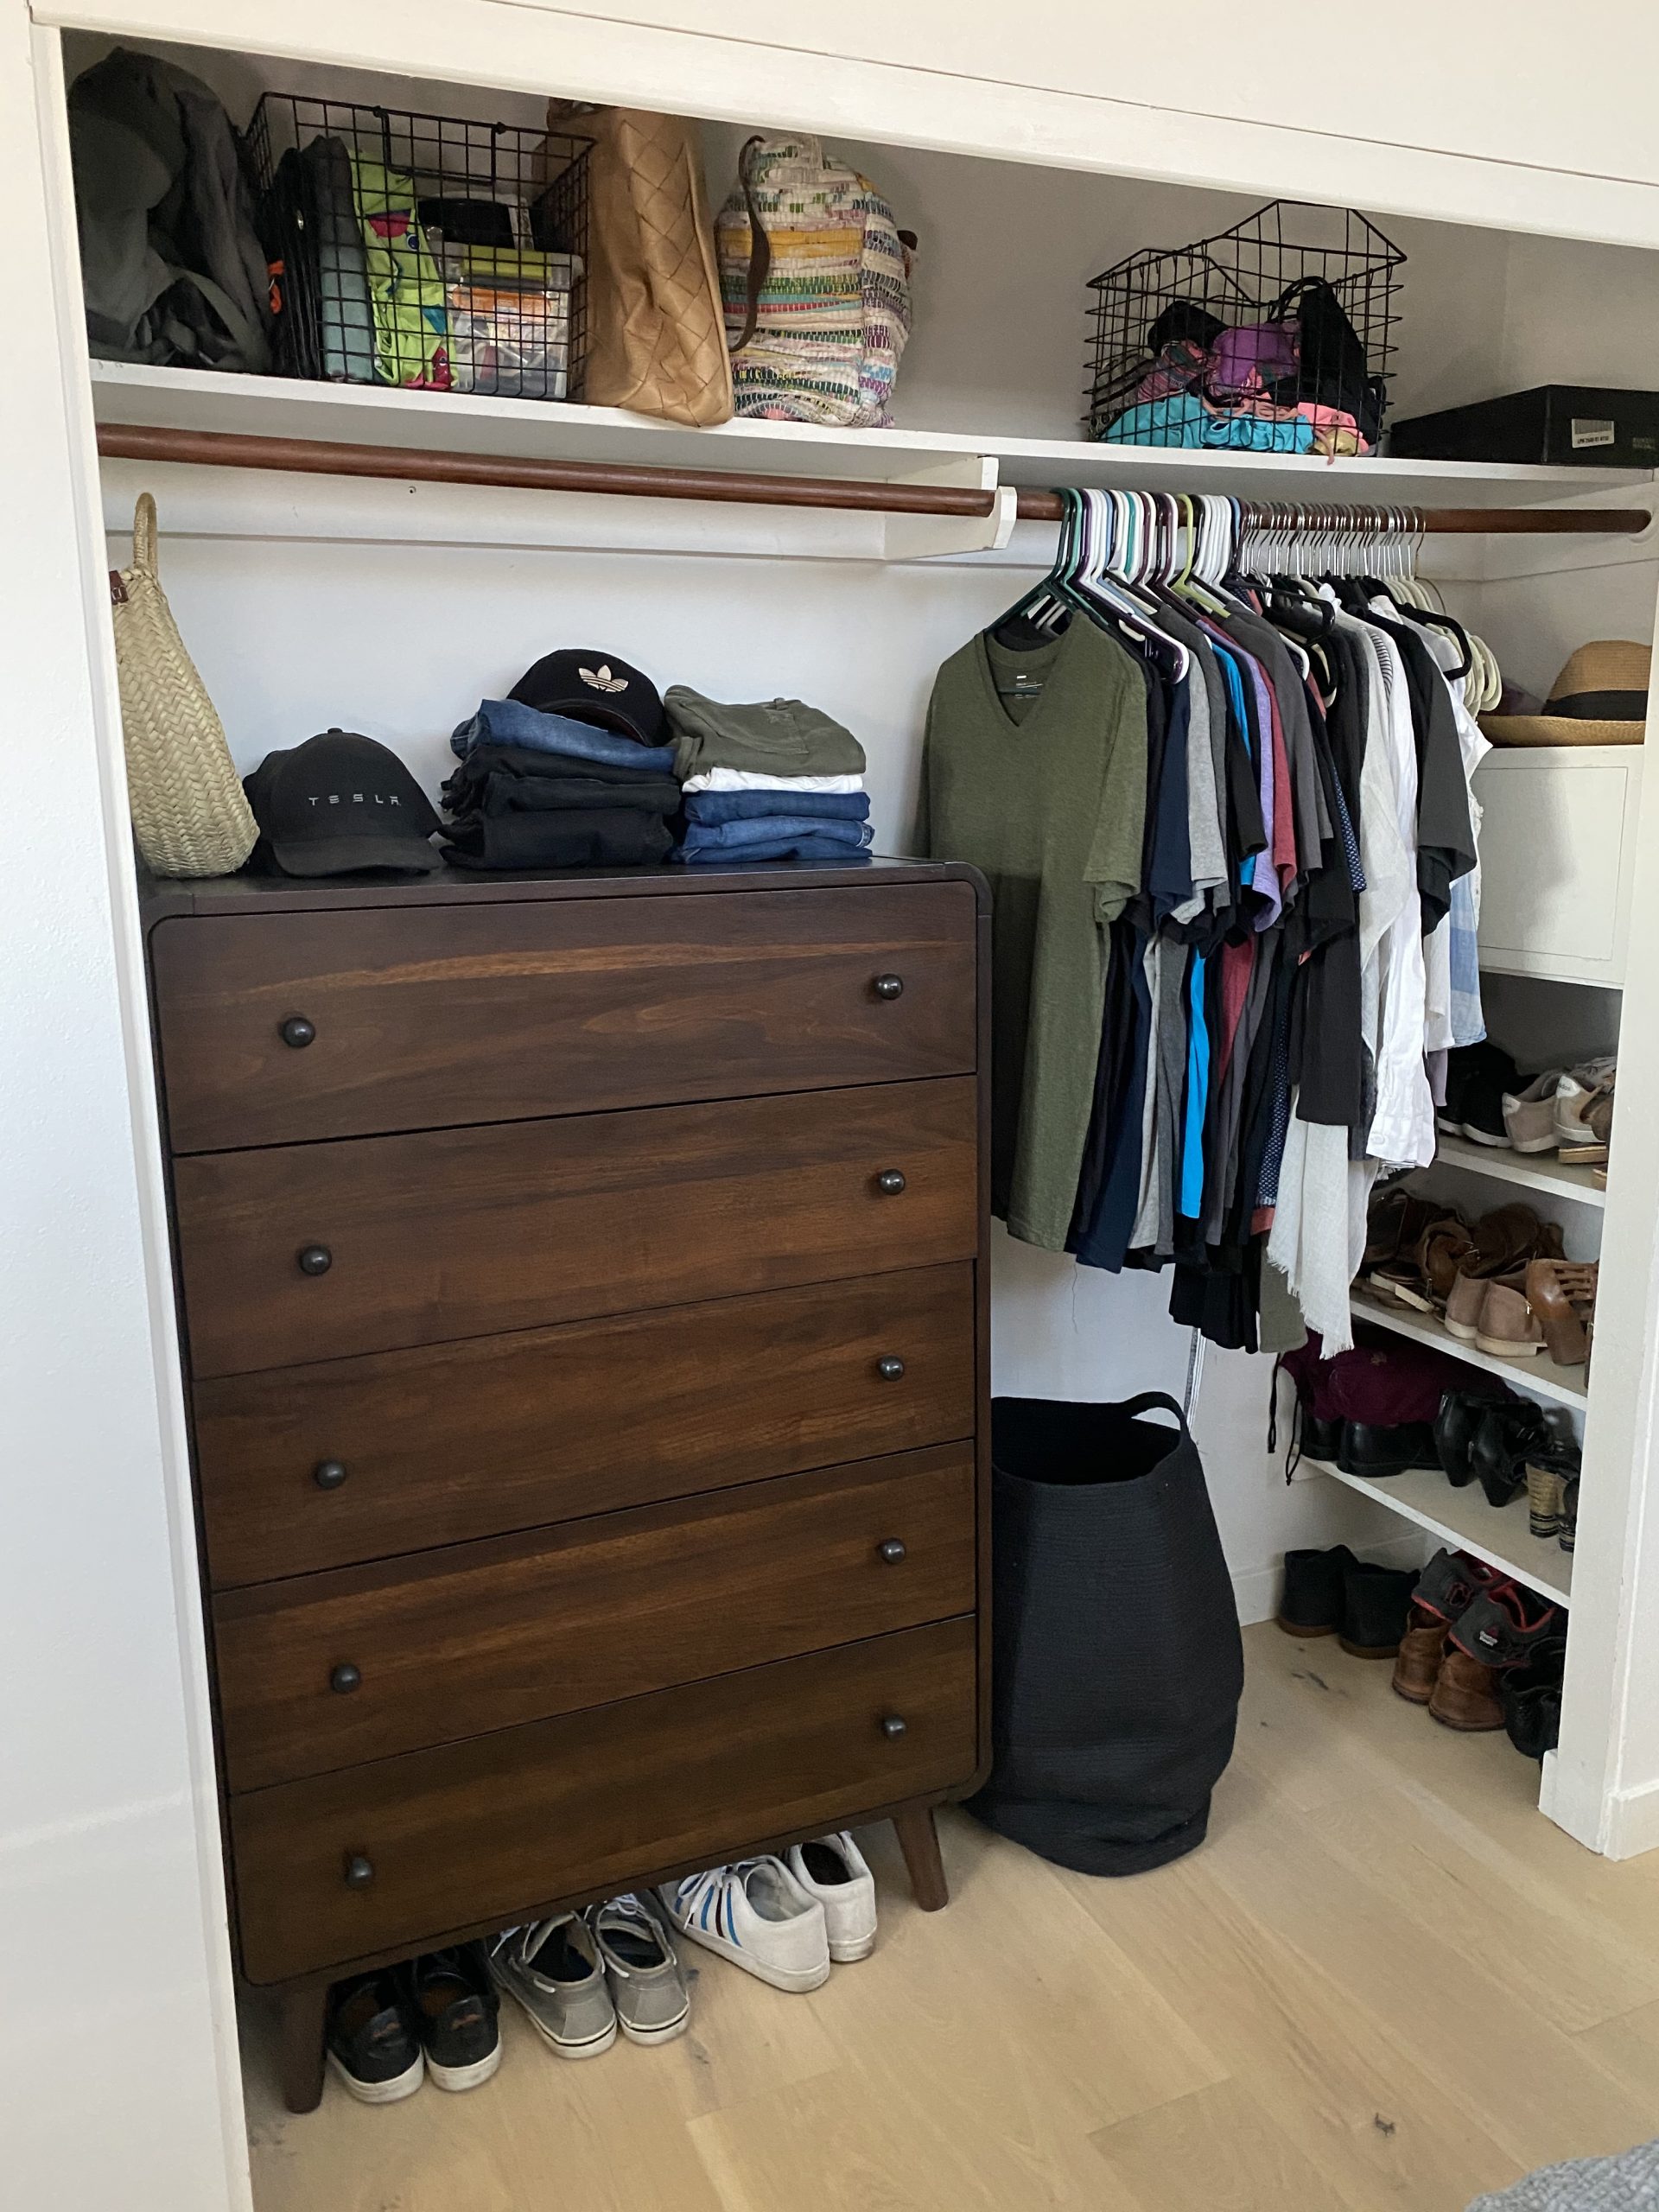
The plan in to build-in some custom drawers inside the closet along with reconfigured shelving and hanging storage but for this challenge since I couldn’t find anything off the shelf to purchase for our closet size I’m going to save the custom build for a later time when I can really focus the time and budget to it.
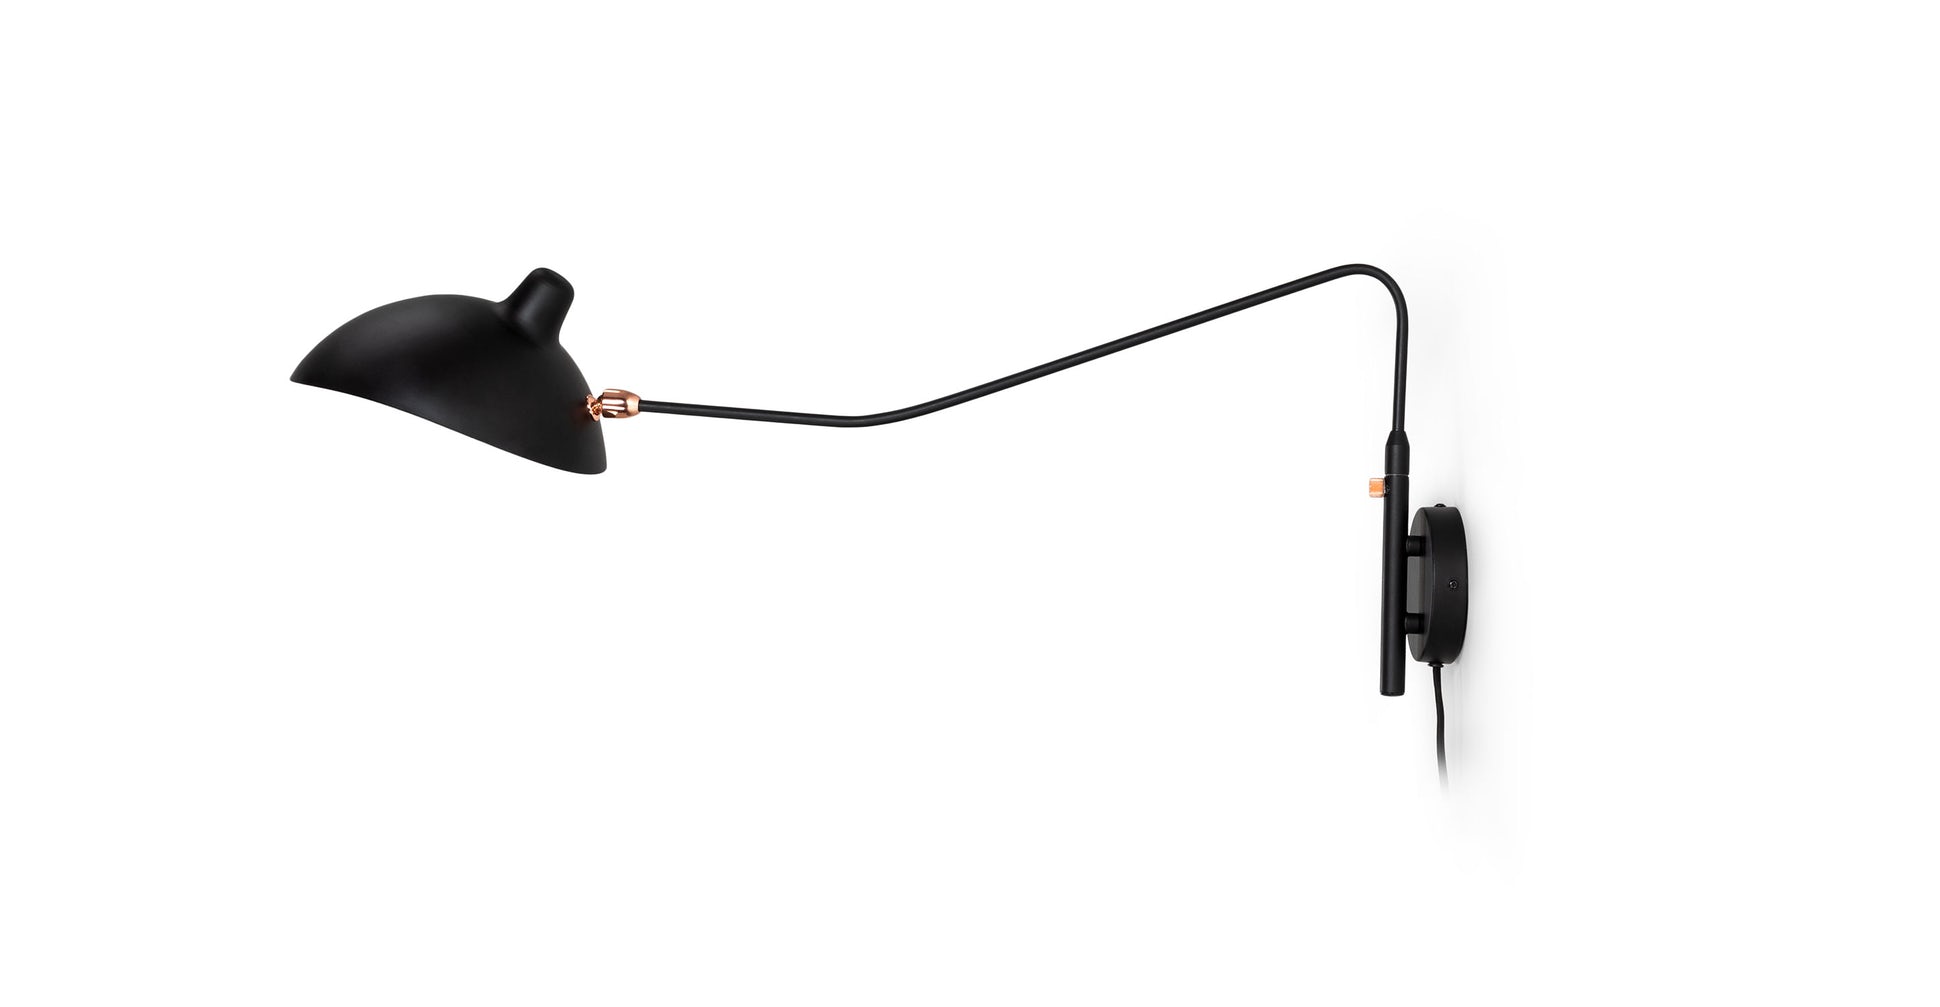
So after 3 weeks of waiting our bedside sconces arrived from article and were a total bust! The swing arm function doesn’t lay flat to the wall so it’s normal position is off the wall a foot and a half. Although they may have worked for a photo they were completely impractical for getting in and out of bed. For the look, the price point was incredible so I was hoping they would work out. I’m back to browsing the internet for a unique and modern black sconce that can arrive in a few weeks. ha, wish me luck!

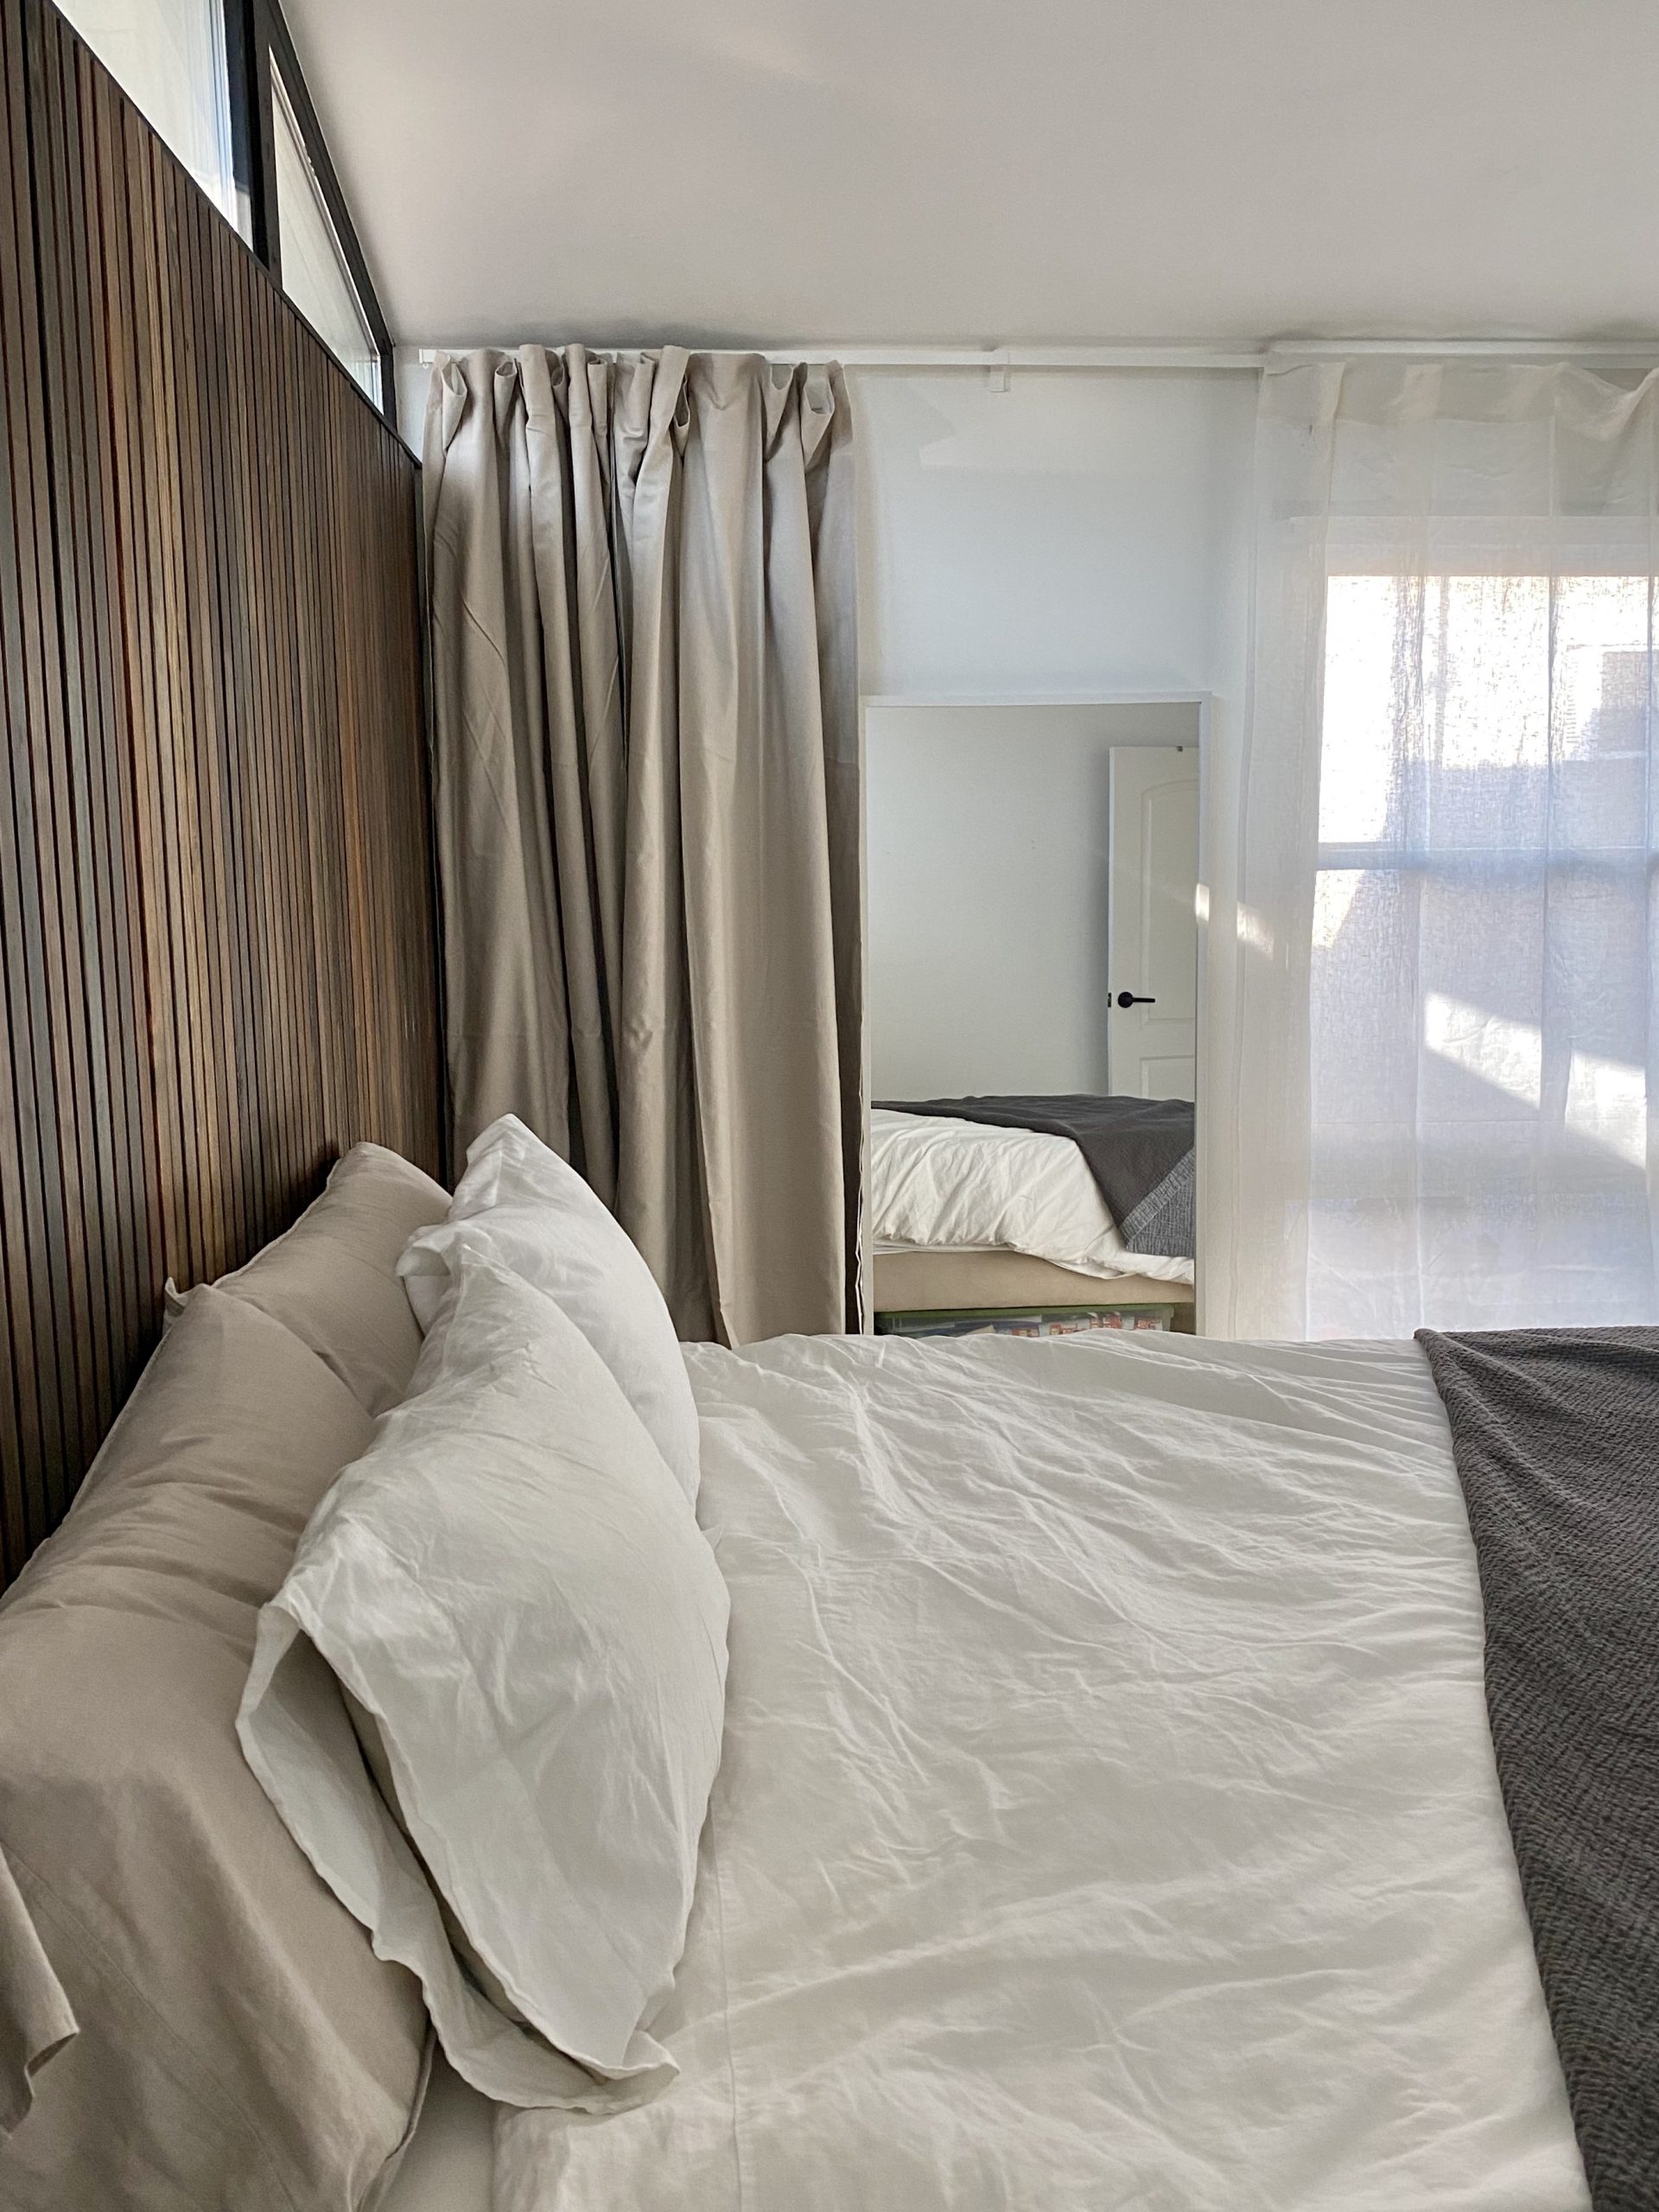
Lastly, IKEA finally re-opened and I ventured there to pick up the supplies I needed for the curtain wall. I went with the Vidga track system. Price point is great and I love how the curtains can slide all the way to each side with no bracket obstructing it’s path. It took a bit to get them hung with measuring and trimming the rail down but it’s relatively simple. Putting the tiny clips on the curtain panels was the most time consuming. I snapped a quick photo before I took them down to hem. Once they were up I also realized I needed way more hanging clips to create the look I’m going for. They sag a bit now. So it’s back to IKEA for 2 more bags of $3 clips.
So there ya go, a little One Room Challenge update. Next on the list is to hang the gallery wall prints (they are en route from the printer), DIY make and install a ceiling pendant, install wood slats over the windows, DIY 2 bedside tables out of wood and concrete, and hang the curtains once hemmed. Then it’s time to style. I’m feeling the crunch to complete in a short amount of time, but hopeful I can do it!
Be sure to check out the other guest participants of this Spring’s One Room Challenge, there is some really great progress going on!
See ya next week!
xx Jennie